Spring 1 2012 Meeting Photos

Bill Minnick

Well-known member
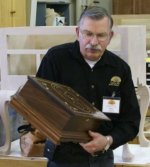
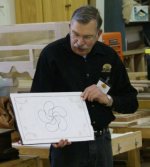
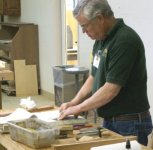
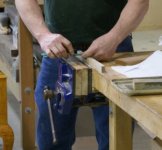
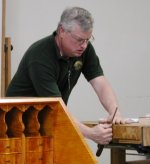
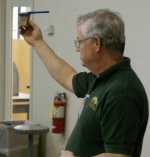
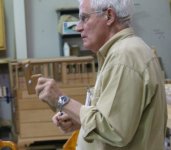
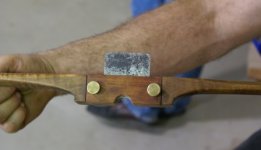
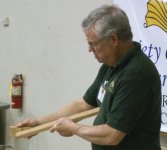
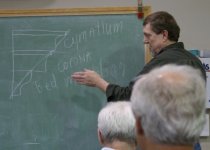
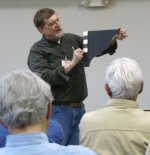
For the meeting's Show & Tell, Peter Howell brought a walnut jewelry box and explained the techniques used in its construction. He decorated the top with a line & berry inlay design using holly stringing. Peter used a CAD program to create the inlay pattern. Using a router and a circle-cutting jig with a pivot pin, Peter cut the arcs.
 

Attachments

  • 1711.jpg
    1711.jpg
    83.6 KB · Views: 19
  • 1717.jpg
    1717.jpg
    83.4 KB · Views: 15
David Boeff brought to the meeting an outstanding desk-on-frame that he built in 2011. David used Tiger Maple as the primary wood. He based the design for the desk on one displayed at Yale University. To suit his personal tastes, he also incorporated design elements from other similar pieces. The gallery was based on a desk displayed at Winterthur. David's wife liked the desk so much; she requested that he build a chair for it. Naturally, David responded and brought the finished Boston Queen Anne-style side chair to the meeting.
 

Attachments

  • 1724.jpg
    1724.jpg
    104.7 KB · Views: 18
  • Image010R.jpg
    Image010R.jpg
    52.8 KB · Views: 18
Steve Arnold shows the group a walnut spice box that he built. He even shows the group the secret compartments that he added to the piece.
 

Attachments

  • 1728.jpg
    1728.jpg
    93.5 KB · Views: 17
  • 1729.jpg
    1729.jpg
    90.7 KB · Views: 16
Jim Crammond shows the group a spoon, butter knife and spatula that he built while conducting a hands-on class that his daughter asked him to teach. To Jim's surprise, she invited eighteen of her friends to attend. All were first-time woodworkers that wanted to build something out of wood. For the class project, Jim picked wooden cooking utensils. Jim supplied the square blanks, provided the hand tools and instructed the group step-by-step in how to make the utensils. Everyone had a great time, and Jim highly recommends that we all try to get more first time woodworkers involved in our wonderful hobby.
 

Attachments

  • 1730.jpg
    1730.jpg
    84.9 KB · Views: 15
Although not period furniture, John Herrel brought two beautiful pencil holders to the meeting. He segmented different species of wood together, turned the blanks and applied the finish on a lathe.
 

Attachments

  • Image015R.jpg
    Image015R.jpg
    54.1 KB · Views: 3
  • 1734.jpg
    1734.jpg
    74.3 KB · Views: 9
Paul Sanow discusses how he built a Sheraton field bed out of mahogany and birdseye maple inlay. He brought in one of the bedpost legs and explained how he used a segmented turning process to make the post. He also brought in pictures of his completed bed. He did most of joinery work by hand except for drilling the holes for the mortises on a drill press.
 

Attachments

  • 1736.jpg
    1736.jpg
    79.2 KB · Views: 15
  • Image016R.jpg
    Image016R.jpg
    45.8 KB · Views: 7
Dick Kammerer brought to the meeting the upper chest from a spectacular Bombay Chest that he recently finished. He used 1/16 inch veneer for the face surfaces of the drawers and sides. Topping the chest is a hand carved Phoenix bird.
 

Attachments

  • 1755.jpg
    1755.jpg
    85.7 KB · Views: 15
  • Image035R.jpg
    Image035R.jpg
    44.4 KB · Views: 18
Bob Compton shows the group pictures of the southern corner cupboard that he built. He used ash and finished the piece with milk paints followed by shellac. The 1745 original is in the Williamsburg collection.
 

Attachments

  • 1757.jpg
    1757.jpg
    76.4 KB · Views: 9
Allan McNeel explains the process for sharpening a card scraper.
 

Attachments

  • Allan1.jpg
    Allan1.jpg
    83.1 KB · Views: 5
  • Allan2.jpg
    Allan2.jpg
    81.1 KB · Views: 6
Allan clamps a card scraper in a vise and uses a scrap of wood as a rest for his diamond mini-hone sharpeners. Then he sharpens the edge at 90 degrees to the faces.
 

Attachments

  • Allan4.jpg
    Allan4.jpg
    81 KB · Views: 7
  • Allan3.jpg
    Allan3.jpg
    80.5 KB · Views: 9
With the card scraper resting flat on the bench and extending a couple of inches past the bench's edge, Allan uses a burnishing tool held at 10 to 20 degrees to draw the edge. If the corner is sharp, you don't have to press very hard and only four to six strokes are needed.
 

Attachments

  • Image024R.jpg
    Image024R.jpg
    43.3 KB · Views: 3
When sharpening a gooseneck scraper, Allan attaches a small block of wood to the diamond mini-hone sharpener to help maintain a 90 degree angle. He then sharpens the edge.
 

Attachments

  • Allan6.jpg
    Allan6.jpg
    69.8 KB · Views: 6
  • Allan7.jpg
    Allan7.jpg
    70.9 KB · Views: 5
Allan uses a slip stone to sharpen the inside radius edges. He also suggests wrapping sandpaper around a dowel to sharpen inside edges.
 

Attachments

  • Allan8.jpg
    Allan8.jpg
    93.4 KB · Views: 3
John Fitzpatrick shows the group a profile scraper that he made from two scrap pieces of wood and a thick, wide, band saw blade. The cutter is held between the two wood sides by two bolts. He filed the bead profile into the metal blade. John used this profile scraper to form an edge around a curved furniture part.
 

Attachments

  • Allan9.jpg
    Allan9.jpg
    78.2 KB · Views: 8
  • Allan10.jpg
    Allan10.jpg
    84.7 KB · Views: 11
Allan demonstrates using his shop-made profile scraper made from a block of wood with the cutter screwed into the end. The blade was made from card scraper stock. Shown are profile scrapers that others brought to the meeting.
 

Attachments

  • Image033R.jpg
    Image033R.jpg
    34.2 KB · Views: 15
  • Allan11.jpg
    Allan11.jpg
    65.9 KB · Views: 13
  • Allan14.jpg
    Allan14.jpg
    75.9 KB · Views: 10
One attendee uses a metal cutoff wheel to remove the bulk of the metal for a scraper profile.
 

Attachments

  • Allan13.jpg
    Allan13.jpg
    102.1 KB · Views: 3
George Walker discusses his best selling videos: Unlocking the Secrets of Traditional Design and Unlocking the Secrets of Traditional Design: Moldings.
 

Attachments

  • George1.jpg
    George1.jpg
    73.6 KB · Views: 5
George draws a cornice and describes its three parts: cymatium, corona (crown) and bed molding (a brace supporting an overhang). On classic furniture molding, the designer would often eliminate one of the three parts like the corona.
 

Attachments

  • George2.jpg
    George2.jpg
    76.5 KB · Views: 4
George draws three facial angles (60, 45 and 35 degrees) and explains how the molding needs to be tilted, so it can be viewed properly.
 

Attachments

  • George3.jpg
    George3.jpg
    74.3 KB · Views: 2
  • George4.jpg
    George4.jpg
    71.2 KB · Views: 2
George explains proportions by dividing molding into parts to form minor and major parts.
 

Attachments

  • George5.jpg
    George5.jpg
    75 KB · Views: 5
  • Image042R.jpg
    Image042R.jpg
    44.2 KB · Views: 4
Back
Top