Dressing Table Side Tenons

ChuckH

Well-known member
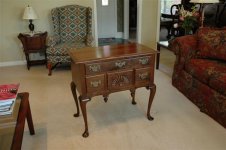
I have a couple of questions regarding cutting the three tenons on each end of the side piece for a Q/A dressing table.  The side piece is 13/16"Thk x 14"H x 14"L plus 3/4" on each end for the tenons.

First, does anyone have any suggestions for sawing that 14" long shoulder?  I've never attempted one this long.  I'm thinking I'll probably clamp a guide board along the scribe line and saw away with the tenon saw, but depth control along the length is a concern.

The second question is about lining up the three tenons on each end with its respective mortice.  The mortices are chopped in the leg posts and I can chop a pretty fair mortice, but I'm not a machine and there are bound to be subtle variances.  Knowing that there is a fine line between a good fitting M/T joint and one that is too loose, how do you account for the slight variations across three joints?  Or do I just hope for the best?

-Chuck   

 
I knife the shoulder line with a #11 exacto blade against a metal strightedge clampled to the board; going over several times.  I then use a bench chisel to pop little wedges of wood out on the waste side.  This will give you a recess to start your backsaw in.  The knife line is kept sharp.  You should slightly angle the saw to get a bit of an undercut. If you don't get the undercut, you can easily use a bench chisel to pare the shoulder.  Just pay attention to the saw entrance and exit for controlling depth.  I tend to always go deeper on the entrance side, so I usually end up having to tip the saw a bit to the exit side at the end of the cut.

I alway cut my tenon shoulders this way whether they are 14" long or 1" long.

As far as alligning the tenons with the mortise, you should be marking both out at the same time (use a knife).  This will leave knife lines in the end grain of the tenon, which can be used with a square to draw pencil or knife lines along the cheeks of the tenon.

Recently I started to use a slightly undersized mortise chisel, and then as I progress I pare the cheeks with a wide bench chisel.  I register the bench chisel in my layout lines (knifed). I've found this gives me better control over the size of the mortise, and makes pulling the mortise chisel out of the mortise much easier.  It also lets me control the angle of the moritse sides.  I don't like to drill-out the mortise first, because I find it make the process more difficult.

I also always do the mortises first, then pare the tenon shoulder to fit.

I've chopped a lot of mortises recently when making a Chippendale sofa and two Queen Anne easy chairs.  These have mortises everywhere, and many of them are at angles.  I'm sure there are many other methods, but this is the method I've evolved into, and I no longer search for a better way to hand cut M&T joints.

In summary I think the best tip I ever got from Gene Landon was to lay everything out with a knife.and use the knife to register your chisels.
 
Tom,
Thanks for the reply.  The method you prescribe is the same one I use, I was just concerned about keeping the reference to the shoulder along a long cut.  I first saw this method from Tage Frid.  Unfortunately not personally from Tage, but from one of his books.

I didn't layout the tenons and mortices at the same time, but don't think I'll have a problem with that.  My biggest concern is if the mortices aren't in perfect alignment.  It sounds as though you have developed a good method of morticing to control the alignment.  As for myself, and the reason I no longer drill out mortises, the more paring I do to a mortice the worse it seems to turn out.

I think I'm going to have to glue up some practice pieces.

Regards,
-Chuck 
 
Chuck,

I too find sawing a long shoulder like that risky.  I suspect that is how it was done originally, however.  But that is just a hunch.  What I have done is use my moving fillester.  That means the end of the board, a feature we really don't care about, must be square.  Next time I do it, I'll try a clamped on fence and a dado plane to form the shoulder.

To make a saw cut like this, you want a deep knife line and a cross cut back saw with a lot of rake.  I've had success, sawing both corners.  Might even be smart to bring in the tenons on the ends a little bit.  Oh, you've already cut your mortises. That shouldn't be a problem.  And I wouldn't worry about your mortises being in perfect alignment with each other.  Your board isn't going to stay straight either.

One more thing that might help. On Philly pieces the knee blocks always run parallel to the leg. Consequently, the carcass sides will pull up off the knee block in time.  The sides on the last piece I looked at looked like every tenon was pegged thru.  I'm not sure this was always the case.  On a piece with corner columns the mortises are thru, into the column area.  But you can't see them because the column covers them up.

I've read here discussions about which tenon to peg.  One strategy offered was to peg the bottom to retain the connection with the glue block.  Sounds like a good idea.  I am seeing glue residue at the interface between the knee block and the carcass side.  I think they intended that to fit nicely there and the ravages of time took their toll.  As I said though, the last piece I photographed in Philly's lab was a Chippendale piece and all its tenons were pegged thru.  I think this is fairly common.

Adam
 
Sawing a long shoulder like that is very risky. Generally I make the tenon with a rabbet plane. I square off the end of the board and then use a cutting guage to incise a sharp line. Then I use a moving fillister (rabbet plane) set to cut just short of the incised line. I chisel the line deeper as I cut the rabbet deeper until I'm at a depth that the rabbet plane won't chip pieces off the face of the sideboard. I then plane to depth.
I have sawn the shoulder but in order to insure a crisp line I do the following. I mark the line with a marking guage (again board is square) and then mark another line approx 1/16" on the tenon side. I clamp (actually nail) a guide batten on this line and saw this second line to depth. I then turn the board upright, tenon end up. The tenons have been previously marked out on the end of the board and I chisel out the waste (the material removed by the rabbet plane in the above method) finishing with my chisel in the guaged tenon line. This is quick and easy if you have straight grained wood and a relatively short (1 1/4") tenon. Otherwise as you remove the waste you run the risk of the grain running into the tenon and the chisel cut removing some tenon material. Even in this situation it's usually easy to leave then tenons a little thick and then trim with a shoulder plane. Then return to the face side and chisel the shoulder by chiseling to the original line.
There was a long discussion about pinning tenons on a wide board previously. As per Dennis Bork I glue and pin the lowest tenon so that it won't move to knock out the knee block. The other tenons are just pinned as previously described (I think the thread was somthing like "Tenons on a wide board".

Howard Steier
 
One other tip if you decide to use the method Howard and I are suggesting:  There typically is no material between the tenons.  So if you are gauging in from the edge of the board, either with a cutting gauge (I've done that too, Howard) or with a moving fillester, be sure to gauge the back side as well.  That material has to be basically chiseled out or sawn out with a coping saw and then pared to the line.  In either case, it's good to have knife lines on the front AND back of the board.

Adam
 
Adam & Howard,
Thanks for the suggestions.  It sounds like I definitely want to start with a well knifed line.  I like the idea of the offset line and removing the waste with a moving fillester - should be able to control the depth and thickness of the tenon that way.  Then paring back to the shoulder with a slight undercut as Tom suggested.  Sounds like a plan. 

I think I'll have to try my hand at sawing a couple of the inside shoulders, just to see how I do.

I found the thread(s) on pinning the tenons and I must admit that is an interesting approach.  But I am a little puzzled that while it was mentioned about elongating the holes in the upper tenons, I didn't see it mentioned about elongating the mortices (or narrowing the tenons).
Maybe I'll resurrect one of those threads and get some thoughts on that.

Alright, off to the shop to cut some tenons.

Thanks again.
-Chuck
 
I'm with Adam and Howard on this.  A plane is a much easier tool to use than a saw for a tenon this wide.  A wooden moving fillister is what I use, but you could also use one of Lie-Nielsen's Stanley #140 planes, or Lee-Valley has just started producing a derivation of the Stanley #278 skewed metal fillister.

And, of course, if you like power tools than a table saw, a dado stack, and good miter gauge will make short work of this job.
 
Table saw?  Yuck!

Well after trying a few different methods I have to agree that the moving fillester works best.  Of course, as Adam pointed out, your board must be square and it would have worked better if the nicker on my fillester wasn't missing.  I'll fix that tomorrow.

I also tried the clamped on guide to saw a groove and used the guide with my #78.  That also worked well, just a little more fussing around.

On the inside I just cut to the final shoulder line.  But I got real good results on the face side by using Howard's suggestion of scribing a second line just outside that line and then paring back to the finished shoulder.

Adam, you were right, I didn't have to worry about the mortice alignment.

I got one side finished today, hope to get some shop time tomorrow and finish the other side.

Regards all,
-Chuck


Well, not that I disagree with you.  My opinion is that period furniture made with power tools isn't an authentic period reproduction, but there are lots of professionals that would (probably violently) disagree with me.  They may have a point - many customers don't know the difference, and will not pay for the extra work.
 
I just recently finished the dressing table that Phil Lowe wrote about in the current FWW.  I took a class at Phil's summer before last on that project.  Anyway, Adam backed up my suspicion's on why one of my knee blocks isn't aligned anymore!  I just noticed it the other day.  I spent a lot of time getting those joints nice and smooth.  Oh well.  Live and learn.  I like the idea of pegging the bottom tenon.  I'll try that next time. 

Tony
 

Attachments

  • DSC_9369 (Small).JPG
    DSC_9369 (Small).JPG
    47.4 KB · Views: 63
Tony,
There appears to be varying thoughts on this subject (surprised?).
I read Lowe's article and noticed that he glues all the tenons, but didn't pin any of them.  He also mentions that you should leave some room in the top and middle mortices for seasonal movement (in a glued joint?).  Then there is the comment that the knee block (transition block) will prevent downward movement of the side.
Did the blocks on your table move up or down?  Just curious.

Another thought about knee blocks:
I don't think I dreamed this, but I cannot find where I read about someone attaching the knee block to the leg only.  He left it float loose against the side of the case.  That would be a sure-fired way of preventing them from moving or popping loose.

BTW,  very nice effort with the dressing table.  I really like the sweep of those legs.

-Chuck 
 
Looks like chairs with carved knees had their knee blocks applied and were carved seperate from the chair.  The leg was later introduced to the chair and the fit between the seat rail and the glue block was what it was.  I haven't seen evidence of guys not gluing this joint.

But this build sequence suggests a very different relationship between chair maker and carver than I originally suspected.  This information suggests they were either the same guy or had a very close working relationship.  Now in Philly, many of these guys worked within a couple blocks of each other.  So an "in-house" carver may not have been 100% on the premises.  And there may not even have been space for him.

I spent some time in Italy when I was a small boy.  The waitors would ask what we would like for dessert.  "What was on the menu?" we'd ask,  "Anything you want" was the reply.  The waitor would take a tray with a doillie on it and walk down the street to an ice cream shop or bakery and come back with dishes of ice cream and spoons. 

In the account book of John Head, this sort of service was provided at no markup.  This sort of thing could have happened with carvers and chair makers, where chair parts went up and down the street several times a day.  I think this is one of the advantages of working in a city and one reason why we might see differences between urban and rural work in some cases.

Adam
 
I hesitate to get into this discussion since Chuck said "Yuck!" to a table saw. Do you really not have a table saw in your shop?  Anyway; in many instances I glue the knee block to the leg only (and may have mentioned this in previous posts). Some of these pieces have been in my house for 30 plus years with no problems. Gluing to both leg and rail seems to be an invitation to trouble.
John McAlister
 
Well, the block is lower than its original position relative to the leg.  Wonder if it will move anymore with the dry winter air?  I'll have to remember and check it.  Far as I can tell, its only the one that has moved. 

Thanks for the comment.  I have to give the design credit to Phil.  He drew it all out.  It was a class participation excercise.  We all stood around the drawing table and took part in the design, but he actually put it to paper.  Worked out well as we got the design experience, but we didn't spend too much time on it. 

Tony
 
John,
Thanks for the reply on the knee blocks.  There are few original thoughts on this end anymore so I knew I had to have read that somewhere. 

BTW the comment about the table saw was a bit tongue-in-cheek.  Yes I have a table saw in my shop, and for 30 years I couldn't imagine woodworking without it.  When I finally decided it was time to pursue the dream of building period furniture I also decided I would wean my self of the power tools - as much as possible (my momma didn't raise no fool).  The T/S still gets a few longing glances from time to time, but then I think to myself, "How would Adam do it?", and I press on.

Regards,
-Chuck


Tony,
I'm sorry to hear that block has moved, but I find it interesting that it actually moved down.  That's just how Mr. Lowe said it would move. 
I am very much a neophyte at working with solid hardwoods in this kind of case construction.  I'm trying gain an understanding of how much these cases can move and how to best control that movement.  But then there is a part of me that says, glue it, pin it and let nature take it's course.

Thanks,
-Chuck
 
Back
Top